Home Products Support Service Forum Order Contact Us CoreWind Technology
The User Manul for Mini210/Tiny210SDK1/SDK2 Board
1. Quickly Start
  1.1  Getting Start for Mini210s
  1.2  Getting Start for Tiny210
  1.3  System Update for Mini210s
  1.4  System Update for Tiny210
2. System Test method
  2.1  Touchsreen
  2.2  rotating screen
  2.3  Play MP3
  2.4  Recording
  2.5  WiFi Internet
  2.6  CMOS camera
  2.7  HDMI output
  2.8  GPS Test
  2.9  Ethenet Setting
  2.10  3G Networking
  2.11  3G SMS
  2.12  Dial-up via 3G
  2.13  USB Bluetooth
  2.14  USB Disk, SD card
  2.15  Backlight Control
  2.16  Serial Port
  2.17  LED Testing
  2.18  PWM Buzzer
  2.19  ADC Testing
  2.20  I2C-EEPROM
5. Board Introduce
  5.1  Different in Tiny210/Tiny210V2
 
CMOS camera
Board Support: Tiny210,Tiny210V2,Mini210S

Android System

Insert the CMOS camera into the mini210s CMOS interface(CON10).
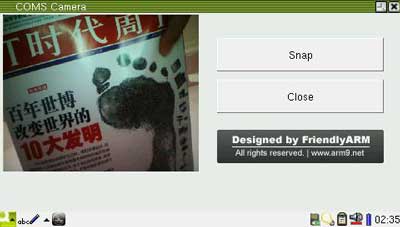
Run the Camera program on the main menu, then it will show as follow:

Linux System

To launch the preview utility you need to use our shipped CMOS CAM130 module . Connect the module to your board, power on, go to the “FriendlyARM” tab and click on “CMOS Camera”. Clicking on “Snap” takes pictures of what your are previewing. After a picture is taken, “Snap” changes to “Continue”. Click on it you will be able to preview again and the picture you just took will be saved in “Documents” (located in “/root/Documents/image/jpeg”). Click on the picture you just took in “Documents” you will see it is opened in Qtopia’s “image” utility.

WinCE System

Released later...
  Tel: +86-755-29638421  |    Sales Email: market@armdevs.com |  Support Email: support@armdevs.com | Gtalk: armdevs@gmail.com  
www.armdevs.com | Copyright @2012 - CoreWind Technology Co.,Limited